Katniss
April 29, 2012
Annika wanted a Katniss inspired manicure and I wanted to try the scotch tape technique. I found a perfect youtube tutorial and followed it to the letter (link below). It’s an abstract rendetion of Katniss’ arrows.
This was time consuming. First we polished two coats of a bronzy gold and let that dry completely. Annika has such great nails. We could have stopped there because it looked so good.
While she dried, I cut up about 30 small elongated triangles with regular scotch tape. I should have taken a picture. Be sure to stick the tape to your hands first to get most of the “sticky” off. You can see what I mean in the video. Then I applied about 3 triangles per nail, making sure to focus the points in a different place on each. After sealing it all down, we applied two coats of a sparkly black. Removing the tape is tricky. Wait too long and you’ll peel everything off, don’t wait long enough and the black will flood. Because we did two coats, our outcome was kinda chunky. One coat may have been better. But I still think it looks great!
- Polish: Finger Paints Figure of Art, Finger Paints Meet Me at the Met
- Tools: Scotch tape
- Inspiration Link: Hunger Games Inspired Nail Art
Penguins
April 26, 2012
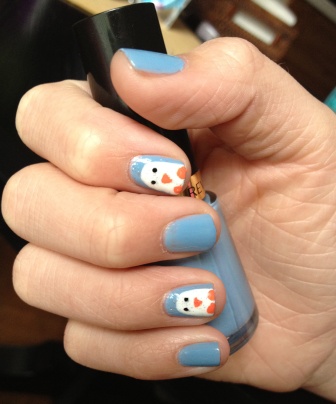
This is so easy and cute. Annika found it on Pinterest which linked to a simple tutorial (it’s so hard to find the originator of some of these ideas!) We had to buy some supplies for this one, two nail art pens. They are worth the money. They write like a fine Sharpie. All we did was polish her nails blue, then paint the white circles and draw on the eyes, beak and feet. We finished off the ring fingers with a light sparkly topcoat. It was a nice touch. I think this is a better look for winter. But not bad for our first attempt at an animal.
- Polish: Revlon Dreamer, OPI Alpine Snow, Pure Ice Don’t You Wish
- Tools: Sally Hansen Nail Art Pens in Black and Orange
- Inspiration Link: Nail Art 101 Penguin Nails
Hello world! Meet Effie Trinket!
April 22, 2012
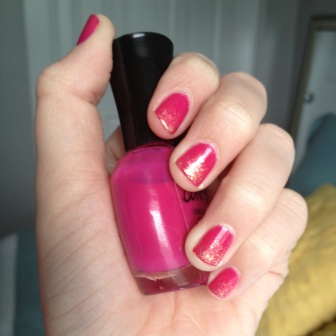
So here we are…our very first manicure post. Annika and her dad were going to a UFC Pay Per View/Hunger Games party (the dads watched the fights while the girls did their thing). Annika has great nail beds! Everything looks awesome on her no matter what. We painted a hot pink background, two coats. After it dried, we used gold sparkle (which we got free in our April Birchbox …yeah)! Paint the gold polish on a makeup sponge, then lightly tap each nail about 3/4 the way down. Reapply the polish to the sponge and this time lightly tap down to half the nail. One more round – apply the final taps just at the tip and lay it on think! Follow with a good topcoat. Next time we do this, we’ll use a glittier glitter. The Essie polish is too subtle.
Polish: Confetti Get the Party Started, Essie As Gold as it Gets
Tools: makeup sponge
Inspiration Link: Cute Polish Effie Trinket Nail Art (Hunger Games)


